I have a bathroom upgrade anyone can do on the cheap.
Installing bathroom shelves above the toilet. Cheap and useful upgrade to any old home.
I went to Etsy and found some shelves made from reclaimed barn wood then added my own additional finish to get the look I was going for. I used used my sander to remove some paint but not all to get the effect I was looking for. Then I coated with a Natural Stain from Minwax. Natural 209 to be specific. The residual paint that was left on the shelves turned blackish after applying and really enrichened the look. Almost looks like burnt wood effect.
After getting the look I wanted with the stain I allowed the shelves to dry and proceeded with putting 3 coats of Minwax FAST-Drying Clear Satin Polyurethane.
When drilling holes for wall anchors for shelves take care. You may have a sewer vent in the area. When you feel you have drilled through the wall stop drilling use a flash light and look through hole if your not on a stud. Odds are you may have a vent in the area do not push through secondary object if you feel a difference in material after passing through first layer. You don't want to be having to remove wall to repair vent if it's there.
Use Stud finders and take your time.
Inside the tow upper floating shelves is a 2x2in piece that mounts to the wall that the upper shelves will screw to.
Applying Natural Finish to bottom of shelf as a test.
Coating all shelves
Use a level and a pencil. You may need a second set of hands when mounting.
Finished
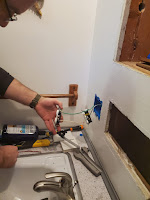
For next improvement make sure your power is off.
This little improvement requires a circuit or tapping into an existing junction box downstairs.
I had a new circuit I installed for the Ceiling fan and I am tapping into that for constant power.
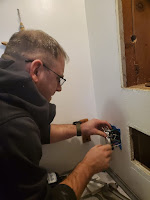
I am also running the GFCI outlet and feeding the next outlet beside the GFCI it's all on the GFCI breaker as electrical code calls for in the bathroom.
Again make sure your power to this is off. I ran everything upstairs first after we fed electrical through the wall from the basement. Since we were next to the sink it was easy from the exposed basement area to determine where to drill and be in the wall referencing the plumbing that ran upstairs.
If you're wondering why I run my outlets upside down with ground up that is because children have been known to hang things on the outlet before and get shocked. My little sister did this once when she was little. She hung a necklace over a plugin that wasn't fully seated in the outlet and it had arced. I believe she was at a toddler age at the time. With ground up it would ground out first.

y
I really needed this power source ran because changing out the fixture was going to cause me to lose the only place I had to plugin devices on this 1950's home bathroom.
To test your GFCI and that your outlet is correctly installed it is advised that you have a tester.
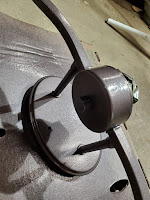
Moving on. We found this fixture on sale for around 5.00 at Fleet Farm as a closeout item. Didn't like the color after getting it out of the box, so I gave it a the Rust-oleum Overhaul.


No comments:
Post a Comment